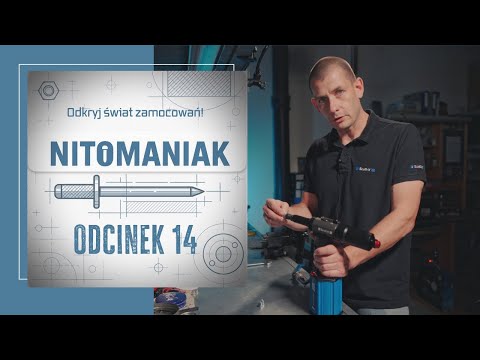
أداة تثبيت المسامير الهوائية الهيدروليكيةScell-It
E-312NP


بيانات عن الآلة
- اسم الماكينة:
- أداة تثبيت المسامير الهوائية الهيدروليكية
- الشركة المصنعة:
- Scell-It
- طراز:
- E-312NP
- رقم الماكينة:
- L030748
- سنة الصنع:
- ٢٠٢٥
- الحالة:
- كالجديدة (آلة عرض)
- الوظائف:
- يعمل بكامل كفاءته
- ساعات التشغيل:
- ٢ h
السعر والموقع
- الموقع:
- Tarnowskie Góry, بولندا
تفاصيل فنية
- الوزن الإجمالي:
- ٢ كجم
- مدة الضمان:
- ٣ شهور
- ضغط:
- ٧ شريط
تفاصيل العرض
- معرّف الإعلان:
- A22109818
- رقم المرجع:
- E-312NP
- تحديث:
- آخر مرة في ١٢.٠٦.٢٠٢٦
وصف
Nose/Mandrel Replacement:
Detailed instructions for replacing the nose and mandrel can be found in our comprehensive operating manual. If you intend to use self-clinching nuts of different diameters, it will be necessary to change the nose, mandrel, and adjust the tool accordingly. Consult the instructions to learn how to make these changes and adjust the mandrel length to the size of the self-clinching nut.
Self-Clinching Nut Installation:
After performing the startup procedures and adjusting the stroke, insert the self-clinching nut into the pre-drilled hole.
Place the mandrel in the self-clinching nut and press the tool. The mandrel will automatically seat itself in the self-clinching nut.
Press the tool trigger to clamp the self-clinching nut onto the component.
The release will occur automatically after the self-clinching nut has been clamped onto the component, allowing you to release the tool.
If the tool is not released from the self-clinching nut, press the button on the back of the tool to force the release.
Stroke Adjustment:
The tool stroke must be adjusted to the component on which the self-clinching nut will be clamped. The E-312NP riveting tool allows stroke adjustment from 1 mm to 7 mm. To adjust it, follow the instructions below:
Precise stroke adjustment is crucial for effective self-clinching nut installation. Here are some tips for controlling stroke adjustment: The stroke can be set from 1 mm to 7 mm. The graduated scale on the tool accurately indicates the set stroke. To increase the stroke, move the adjustment slider towards the front of the tool, while simultaneously turning the knob to the left. Then release the slider, ensuring that it is re-seated on the head. The cursor will indicate the range of the set stroke. To decrease the stroke, follow the same procedure, turning the stroke adjustment knob to the right. Our self-clinching nut riveting tool is designed to allow precise stroke adjustment and ensure optimal installation results.
If the stroke is incorrectly adjusted or the self-clinching nut has a quality defect, the mandrel release may be difficult. In this case, use the "anti-block rod," which is included in the kit. Insert it into the hole in the base of the sleeve and turn it to the right to release the self-clinching nut, as shown in the illustration in the manual.
Hedpjzc Dx Isfx Aqtofh
تمت ترجمة الإعلان تلقائيًا. قد تحدث أخطاء في الترجمة.
مورد
آخر تواجد: الأسبوع الماضي
مسجل منذ: 2026
٥ إعلانات عبر الإنترنت
إرسال طلب
هاتف & فاكس

شهادة الثقة Machineseeker
ما هو ختم الثقة؟
تعتمد Machineseeker بعض التجار المختارين بعلامة الثقة Machineseeker. قبل الإصدار، يتم إجراء فحص موحد وشامل من قبل موظفي Machineseeker ذوي الخبرة.
ماذا نُفَحِّص؟

التحقق من
رخصة الأعمال أو مستخرج السجل التجاري
فحص
عنوان البريد الخاص بالتاجر
التحقق من
بيانات الحساب البنكي
التحقق من
إمكانية الوصول الهاتفي
لرقم الهاتف الرئيسي
يجب ألا تحتوي المعلومات الاقتصادية
على أي خصائص سلبية
قد تؤدي شكاوى المشترين
إلى سحب الختمماذا يعني هذا بالنسبة لك كمشتري؟
بفضل ختم الثقة Machineseeker، يمكنك كمشتري التعرف على البائعين الموثوقين دون فحص شخصي، والذين من المرجح للغاية أن يجروا معاملات صادقة ونزيهة.
بالطبع، قد تظهر خلافات في الرأي أثناء عملية الشراء. Machineseeker لا يتحمل مسؤولية أي مخالفات قانونية يرتكبها المشترون أو البائعون النشطون على Machineseeker.